Before reading this article, please make sure you have familiarized yourself with the ForNAV Direct Print overview: https://www.fornav.com/direct-print/.
This step-by-step guide helps you to quickly set up the Direct Print service functionality of the ForNAV Customizable Report Pack in Microsoft Dynamics 365 Business Central.
If you prefer, we also have a couple of Coffee Break videos that describe how the installation and setup works:
- Set up direct printing of your Business Central reports using service print. Link to recording
- Print your Business Central reports directly using service print. Link to recording
Install the Local Components
Direct Print requires a local service that monitors your Business Central print queue for jobs. The local service is installed via the normal installer for the ForNAV product. You can find it at https://www.fornav.com/download. Please make sure that you have ForNAV version 6.2 or later.
When you run the installer, you can choose the Developer mode, which installs all the components including the Direct Print ones.
Install the Report Pack
After the local components are in place, you can proceed to installing the Customizable Report Pack extension in your Business Central if you have not already done so (either from the Gallery, if you are running Business Central OnPrem, or from Microsoft AppSource, if you are running Business Central Cloud).
The Setup Page
When the extension is installed, go to the Direct Print Setup page. You can search for it like this:

We recommend that you turn off the Delete finished jobs option because, when you first start working with Direct Print, it is helpful to be able to see completed print jobs. When you feel comfortable with the functionality, you can turn it on again.

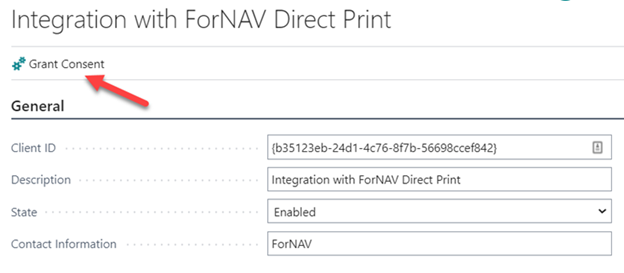
Grant Consent in Cloud Environments
The local Direct Print service communicates with your Business Central. For it to be able to do this, you must register this external application and grant consent. This is easily done from the Direct Print Setup page. Click Actions and then click Reset integration app and user from the menu. After that, you can click Grant Consent. Follow the instructions in the pop-up window to complete the process.
Please note that this step is only relevant if you are running Business Central in the cloud. If you have an on-premise installation then you should read the section about service authentication.
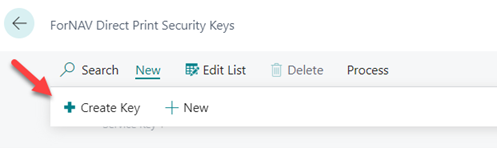
Create a Security Key
The authentication between the local print server and your Business Central requires a security key. This key tells your Business Central that the local service is allowed to get print jobs from your print queue in Business Central.
In the Direct Print Setup page, click Service Keys to open the page for the security keys.

On the page that opens, you can create a new random key value and give it a short description.
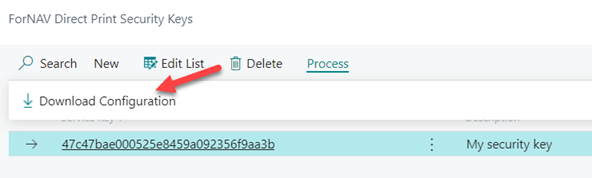
This key, together with your tenant ID and environment name, is all the local service needs to connect to your print queue. These values can be downloaded as a configuration file from this page.
To download a configuration file, click Process, Download Configuration. The downloaded file has the extension fornavprintconfig. It is associated with the user interface program for the local Direct Print service. If you choose to Open the fornavprintconfig file, then it is imported automatically.
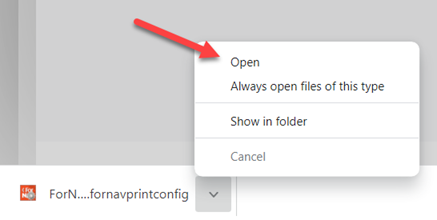
The imported file is shown on the Environments tab in the ForNAV Direct Print dialog box.
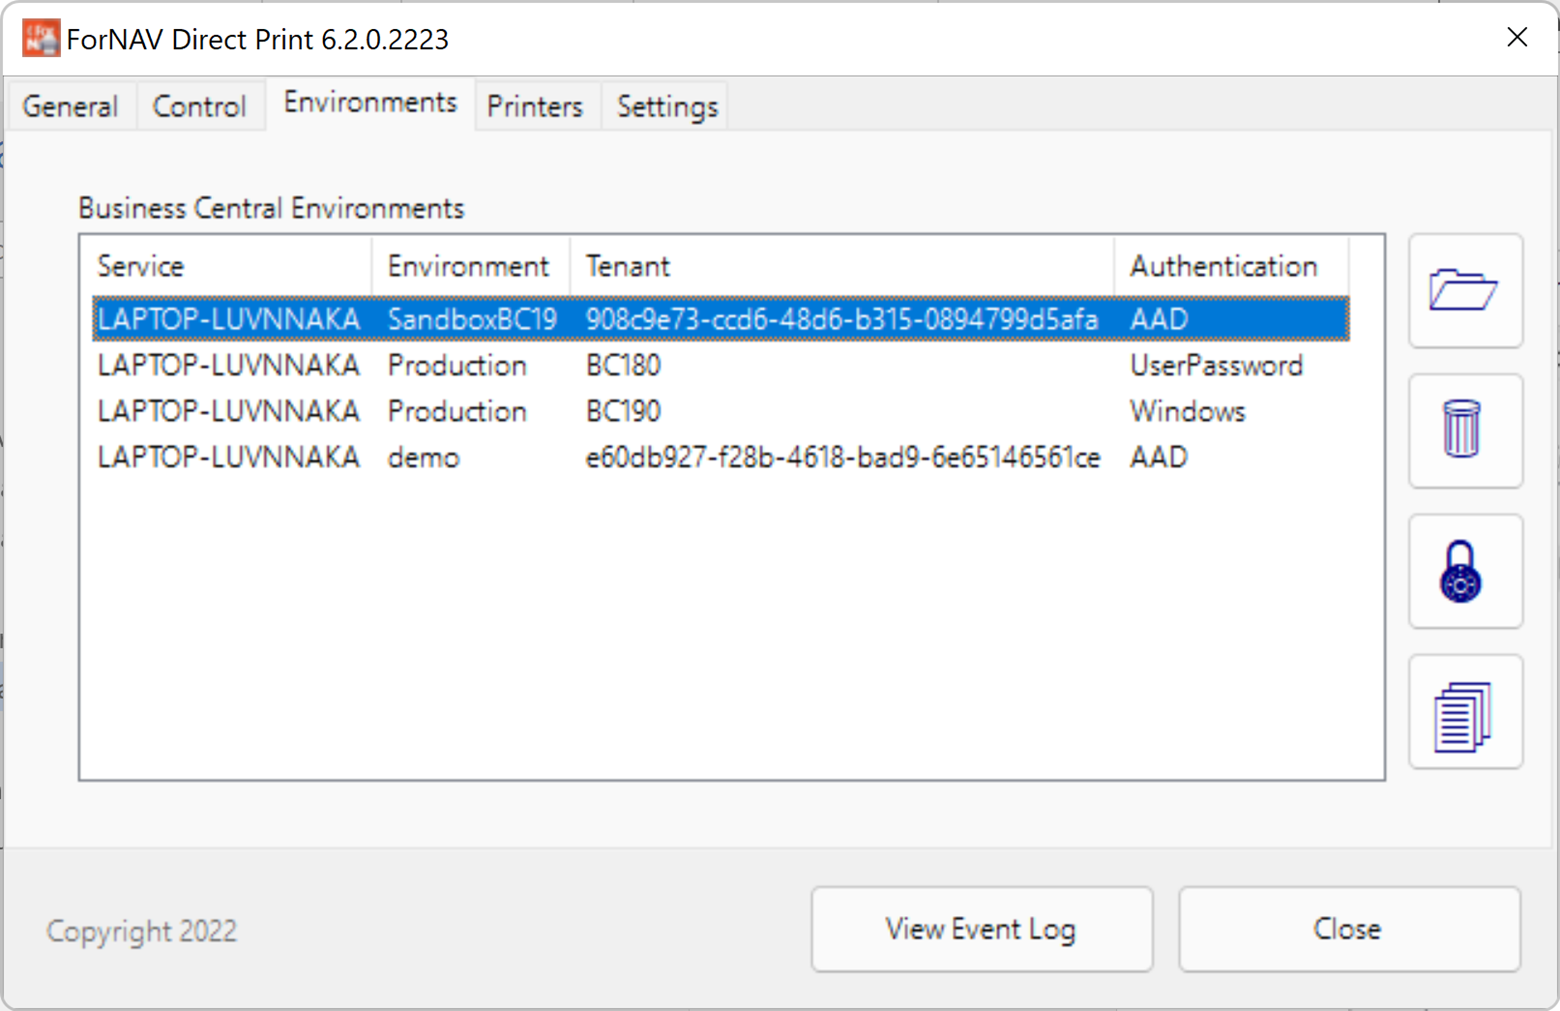
Now the local Direct Print service is connected and listening to events on your Business Central print queue.
Service Authentication
In a cloud environment the local direct print service is granted access to your Business Central via AAD (Azure Active Directory). This procedure is described in the Grant Consent section of this document.
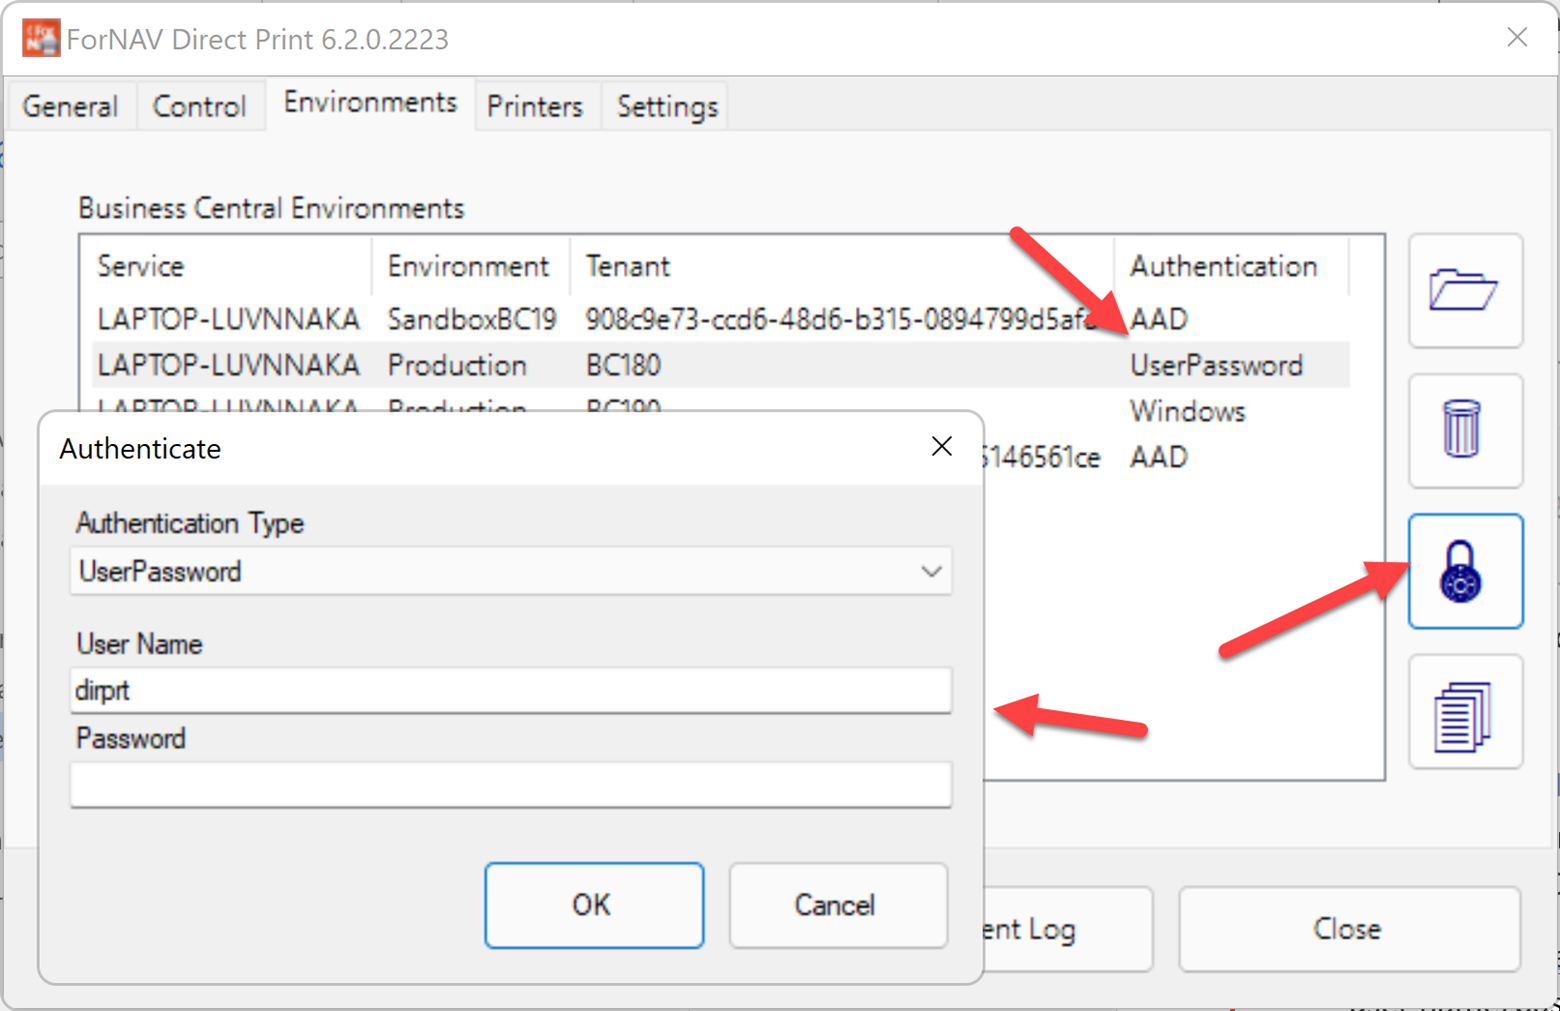
For on-premise installations of Business Central, the access is granted via Windows authentication or a user name/password login. The supported service tier authentication modes are: Windows, UserPassword, and NavUserPassword.
You can set the preferred authentication mode for your connection on the Environments tab.
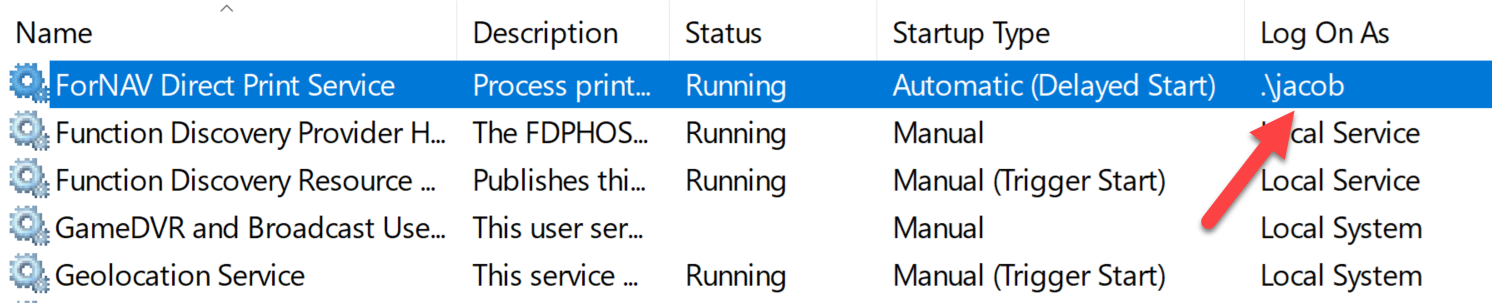
If you are using Windows authentication, it is important to set the correct user account for the ForNAV Direct Print Service. This is done via the Windows Services application.
Permissions
The service user on-premise and the AAD application on cloud use the permission set FORNAV DIRPRT SVC. In addition to this, the on-premise user needs the SYSTEM APP – BASIC permission set.
Create a Direct Printer
In this step, you create a direct printer in your Business Central. When you print to this printer, the print job goes to the print queue inside Business Central.
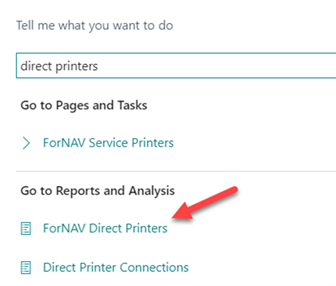
Search for direct printers to open the page.
On the Direct Printers page, you name your direct printer and choose which local printer name it will send print jobs to. You must select the Is Print Service option.
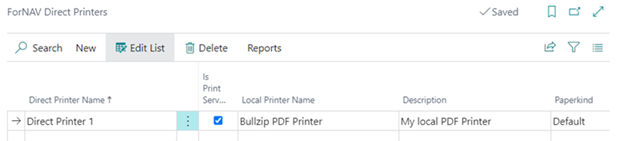
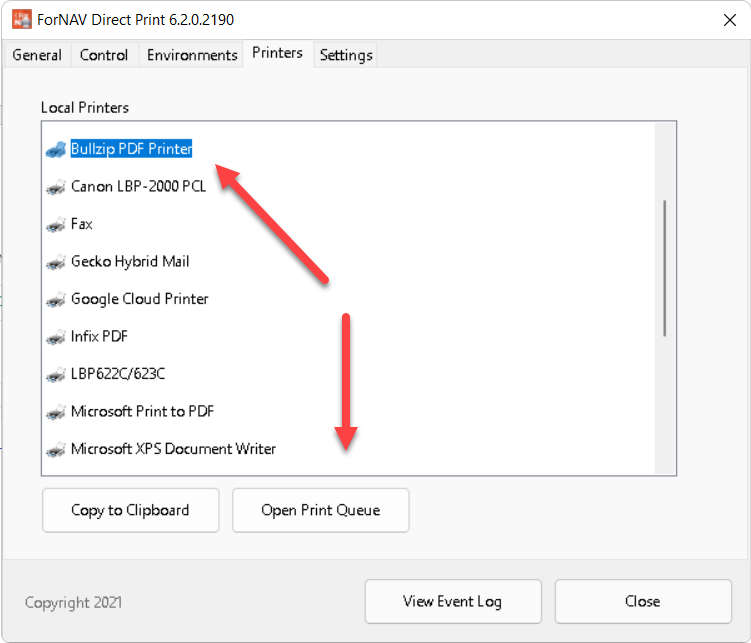
In this example, we will direct the print jobs from Direct Printer 1 to a locally installed Bullzip PDF Printer. However, this could be any printer connected to – or network printer visible to – the local machine with the Direct Print service installed. If needed, you can install the print service on several local machines.
Please note that if the local print service is running as a Windows service, then the user context of the service can affect the available printers. Also, when running as a service, the printers are not allowed to show any user interface during printing.
To learn more about how to set up your printers and printer attributes, please read: https://www.fornav.com/knowledge-base/direct-printer-definitions/
Print to the Direct Printer
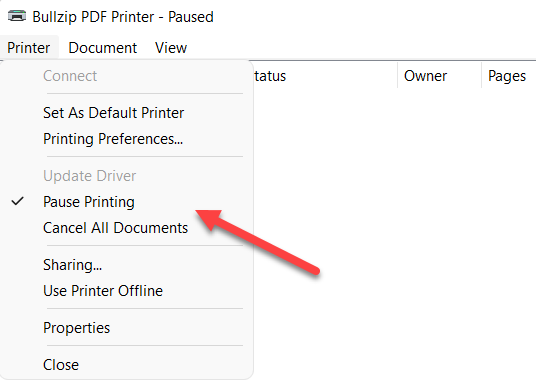
You can pause the local print queue to see that the print jobs are received. To pause the print queue, open the Windows print queue and click Pause Printing from the Printer menu.
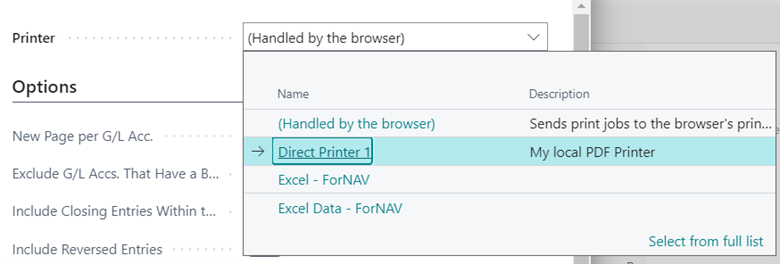
Now you can try to run a report on Business Central and select your direct printer, Direct Printer 1, from the printer list.
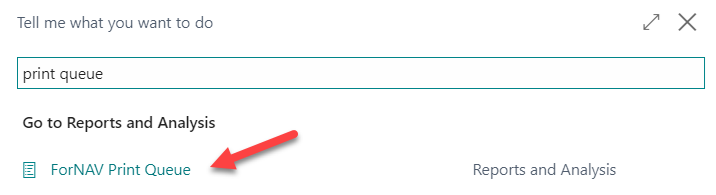
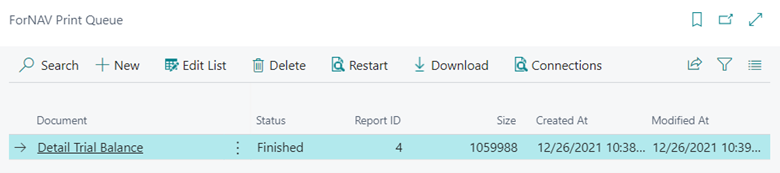
When the print has finished, you can find it in the print queue. You can search for the print queue and open the page.
If things are working correctly, you can see your print job in the queue. It will most likely already have the status Finished. The local print server had time to take it from the queue and send it to the local printer.
This is what it will look like on your local paused print queue:

Troubleshooting
If it does not work as expected, then you can check the following possible fixes:
- Restart the local print service – On the Control tab, in the ForNAV Direct Print dialog, you can stop and start the print service. If it is running as a service, then you can also restart it from the Windows Service Manager.
- Check the local printer’s name – Make sure you have typed the local printer’s name correctly when you set up the direct printer in Business Central.
- Download and inspect the print job – You can download the print job as a PDF document from the print queue. This will help you check if the print job is empty.
- Restart the print job – You can restart a print job from the Print Queue page.
- Make sure that the user account for the ForNAV Direct Print Service can see the printers. You can check this by logging in on your computer as the same user and looking at the printer list.
For an overview of ForNAV Direct Print, please see: https://www.fornav.com/direct-print/
