This Knowledge Base article is relevant for ForNAV version 5.1.0.1850 and higher.
Currently, the only way to add data items to a report in Microsoft Dynamics 365 Business Central is to make a copy of the report and add new data items using Visual Studio Code or in the ForNAV Designer if it is a ForNAV report.
As a result, the code in the report must be maintained separately and other objects pointing to the report must be rerouted to call the new report instead.
Because of this, ForNAV now supports adding data items to an existing layout without touching the AL code in the object/extension.
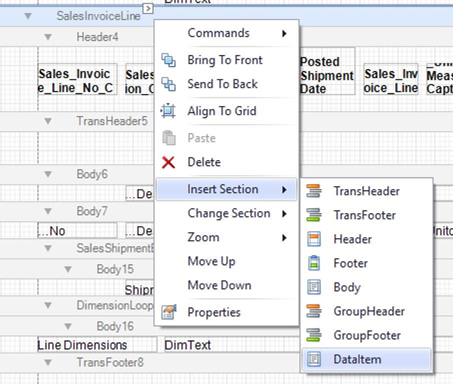
To add a data item, for example, Assembly, under the Sales Line, simply right-click an existing data item or the root report in the Report Explorer and click Insert Section and then DataItem.
The next step is to specify the Data Item Table and Data Item Link values and to specify the Show Output so that only lines with the correct type are used.
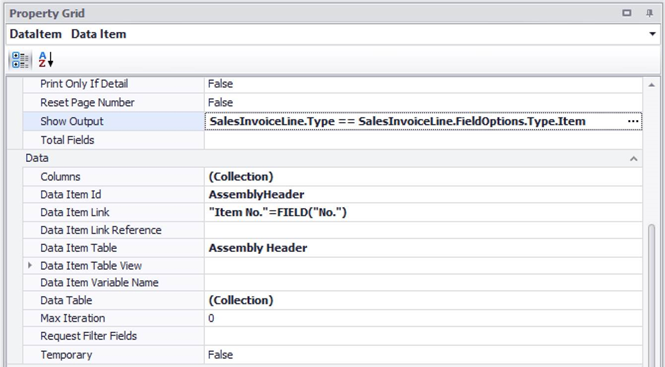
To insert the Assembly
line data item, simply add a new data item to the Assembly Header data item and specify the Data Item Table and Data Item Link fields in the same way as the AssemblyHeader data item.
To complete the report, simply add the required sections and control.
You can preview the report at any time and, after you save, the report will have the new data items and layout.
To deploy the layout from a development setup such as a Sandbox, simply export the layout from the custom layout page and import the layout in the production environment.
The only limitation is that the added data items cannot have request page fields or use temporary tables, because they are hidden from the Business Central/Dynamics NAV report engine. Everything else, including totals and group-totals, works like normal.
If you later save the report as an .al file in the ForNAV Designer using the Save As function, the new data items are inserted in the resulting .al file.
