Installing standard reports in ForNAV
To install standard reports in ForNAV:
- In the Reports ForNAV Designer, click New, and in the Gallery select the ForNAV Report Pack.
Alternatively, you can visit this website: http://bit.ly/ForNAVReportPack.- NOTE
The Gallery works on ForNAV 3.0.0.1279 and higher, and on Dynamics NAV 2016 and higher. - Define the following four parameters:
- Start object number – if you have access to the relevant object numbers in your Dynamics NAV license, select 70000 (or another area from 50000 to 99000).Alternatively, add the ForNAV ISV granule (6188500 Reports ForNAV) in your Dynamics NAV license in Partner Source Business Center (PSBC, previously VOICE) and then you can select the ForNAV ISV numbers starting at 6188471.
- NOTE
If this is your first ForNAV granule sales, as a partner you must first get access to this granule by sending an e-mail to support@fornav.com stating your partner PSBC/VOICE number, and requesting access to the ForNAV ISV granule. - Menusuite ID – select the Menusuite ID for the ForNAV menu.
- NOTE
It is very important that you select a Menusuite ID that is not currently used in your Dynamics NAV database. When installing the ForNAV Report Pack, C/SIDE does not warn you when overwriting objects with similar numbers during import from a text file (txt). - NAV version – the ForNAV standard reports are supported on Dynamics NAV 2016 and higher.
- ForNAV version – if you are opening the Gallery in the Reports ForNAV Designer, this is automatically updated with the ForNAV version you are running. You can change this number if you want the ForNAV Report Pack to work with another version of ForNAV. If you are opening the Gallery from the website http://bit.ly/ForNAVReportPack, you must add this version number manually.
- Start object number – if you have access to the relevant object numbers in your Dynamics NAV license, select 70000 (or another area from 50000 to 99000).Alternatively, add the ForNAV ISV granule (6188500 Reports ForNAV) in your Dynamics NAV license in Partner Source Business Center (PSBC, previously VOICE) and then you can select the ForNAV ISV numbers starting at 6188471.
- A txt-file with the relevant ForNAV objects is generated. Save this file.
- Import the file in your Object Designer.
- WARNING
You must inspect the text file and compare object numbers with your existing object numbers before importing it. C/SIDE does not warn you when overwriting objects during import from a txt-file.
You might run into the issue that your NAV license does not permit you to import tables. In this case, you have to install our uncompiled fob-files first – and then afterwards this txt-file. - Select All objects – and set a Table Filter on Version List (*FORNAV*).
- Select and compile (press F11) the ForNAV objects.
You are now ready to run your new ForNAV reports.
The ForNAV Setup
The first time you run one of the ForNAV reports, you are prompted with the ForNAV setup wizard:
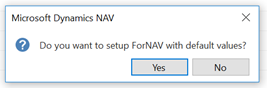
If you click Yes, the following default settings will apply:
- Localization: World Wide
- VAT Amount Specification: Multiple Lines
- All other options will be left blank
If you click No, you are taken through the ForNAV setup wizard, where you can choose the options that are relevant to you (please see the following sections for an explanation of these options). The ForNAV setup wizard will automatically detect the North American localization, based on the existence of table 10000, and it will suggest the Sales Tax documents.
The ForNAV setup wizard will also copy your logo from Company Information (if any) to the ForNAV Setup window.
You can manually modify your settings in the ForNAV Setup window. You can access the ForNAV Setup window from the ForNAV menu under Departments, ForNAV, Application Setup, Administration (or you can simply type ForNAV Setup in the search window).
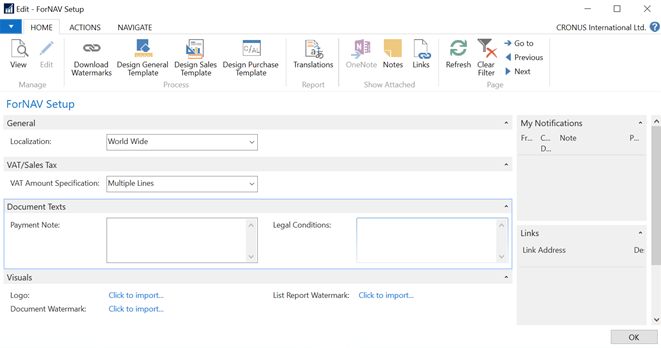
General tab
In the Localization field, as mentioned previously, the ForNAV setup wizard will detect the localization in your database and suggest World Wide, North America, or Other. You can change this setting.
VAT/Sales Tax tab
In the VAT Amount Specification field, you can select what kind of VAT amount specification you want. The default is to only print the VAT specification when a sales invoice has more than two percentages of VAT. Alternatively, you can either NEVER print the specification or ALWAYS. With Sales Tax, this option is not relevant.
Document Texts tab
The Payment Note is placed to the left of the total amount on the document.
Legal Conditions are placed at the very bottom of the document.
These fields are optional and can be left blank.
Visuals tab
On the Visuals tab, you can select your Logo, Document Watermark and List Report Watermark.
The logo that is printed on the reports is the one you import here (and not the logo you have under Company Information, unless you have run the ForNAV setup wizard that will copy your Company Information logo). The reason for having a separate logo in the ForNAV Setup is that ForNAV, besides most picture formats (such as png, gif, and so on), also supports a PDF file as your logo.
- NOTE
To support better scaling and a higher resolution in your printed logo, we recommend using PDF.
To see standard ForNAV watermark templates, on the ribbon, click Download Watermarks. You can also add your own watermarks.
- NOTE
Smaller file sizes of watermarks perform better when printing large reports.
On the ForNAV Setup ribbon, you have the following additional options:
Home ribbon tab
- Download Watermark – select any of the standard ForNAV watermarks on www.fornav.com/report-watermarks
- Design General Template – design your general template.
- Design Sales Template – design your sales template.
- Design Purchase Template – design your purchase template.
- Translations – select the languages that you want to translate your legal conditions into.
Actions ribbon tab
- Delete visuals – delete your Document Watermark, List Watermark, and Logo.
- Replace Reportselection – replace all your current document reports with the ForNAV document reports. For example, when you select Print on an invoice, the program prints the ForNAV invoice and not the standard invoice.
- NOTE
This will not replace the financial reports because they are part of the menu suite from Microsoft. The financial reports can be found in the ForNAV menu under Departments, ForNAV, Reports (or you can simply type Reports and Analysis in the search window). - Test – run this test to check whether ForNAV reports work on your system.
- Check Localization – check your localization. This runs the algorithm that detects in which localization you have imported the objects, and automatically sets the correct values. This runs automatically in the wizard but manually from the ForNAV Setup page.
- Create ForNAV Webservice – select this to expose the Fields webservice (7702). You can also select this in the wizard.

Pingback: OData, Web Services, and Page 7702 not in the customer license - ForNAV